|
|
|
||||||||||||||||||
|
|
|
|
|
||||||||||||||||
|
|
|
|
|
||||||||||||||||
|
|
|
|
|
||||||||||||||||
|
|
|
||||||||||||||||||
|
|
|
|
|
|
|||||||||||||||
|
|
|
|
|||||||||||||||||
|
|
|
||||||||||||||||||
|
|
|
||||||||||||||||||
|
|
|
|
|
|
|
||||||||||||||
|
|
|
||||||||||||||||||
|
|
|
||||||||||||||||||
|
|
|
|
|
 |
|
||||||||||||||
|
|
|
|
|||||||||||||||||
|
|
|
|
|||||||||||||||||
|
|
|
 |
|
||||||||||||||||
|
|
|
|
|||||||||||||||||
|
|
|
|
|
|
|
|
|
|
|
|
|
|
|
|
|
|
|
|
|
|
|
|
||||||||||||||||||
|
|
|
|
|
||||||||||||||||
|
|
|
|
|
||||||||||||||||
|
|
|
|
|
||||||||||||||||
|
|
|
||||||||||||||||||
|
|
|
|
|
|
|||||||||||||||
|
|
|
|
|||||||||||||||||
|
|
|
||||||||||||||||||
|
|
|
||||||||||||||||||
|
|
|
|
|
|
|
||||||||||||||
|
|
|
||||||||||||||||||
|
|
|
||||||||||||||||||
|
|
|
|
|
|
|
||||||||||||||
|
|
|
|
|||||||||||||||||
|
|
|
|
|||||||||||||||||
|
|
|
|
|
||||||||||||||||
|
|
|
|
|||||||||||||||||
|
|
|
|
|
|
|
|
|
|
|
|
|
|
|
|
|
|
|
|
|
"Click on any of the small pictures below to view a larger version"
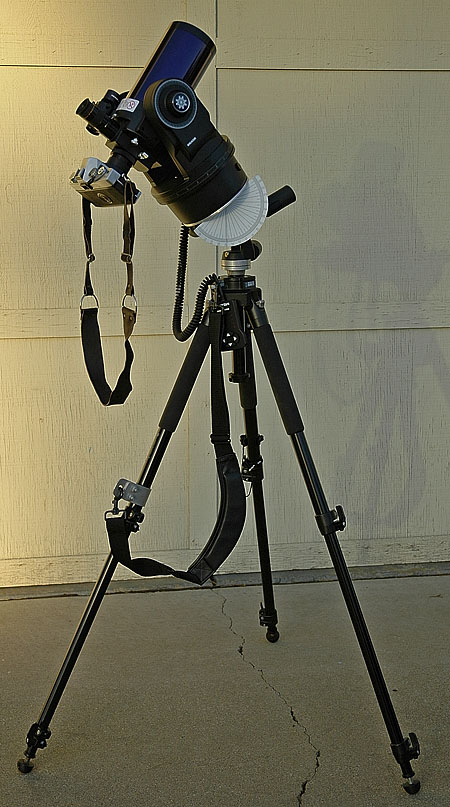
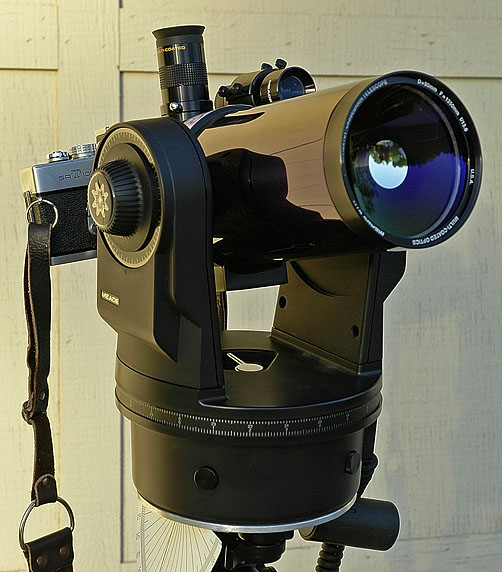
| The above picture was taken with a Meade ETX-90/EC telescope and a Nikon D70 digital SLR camera. The picture to the right is a picture of the basic setup used with one exception. The camera shown in the picture is an old Minolta SRT-101 rather than the Nikon D70 since I was using the D70 to take the picture of the setup. The setup consists of a Bogen / Manfrotto tripod model 3221W, the Meade ETX-90/EC telescope, a homemade base plate to attach the telescope to the tripod, a Bogen/Manfrotto 3030 tripod head, a T-mount camera adapter, a homemade angle protractor, and a Meade T-mount adapter tube. The custom homemade base plate can be seen in the picture as the silver plate under the base of the telescope. I also modified the tripod by adding a carrying strap. The strap is just a standard shoulder strap off of an old computer carrying case. Click on the picture to see a much larger view of the setup. |
|
| Please keep in mind that I am not an astronomy buff so my knowledge of astronomy is pretty basic. I just like looking through a telescope from time to time. If you ask me questions about astronomy I will likely give you an answer that any other guy on the street would give. |
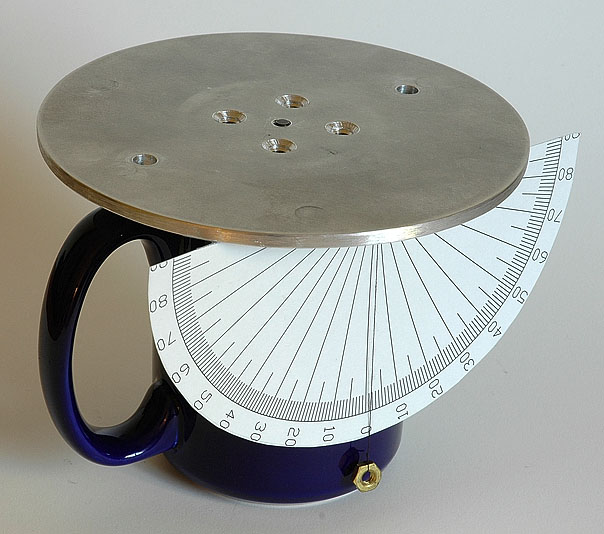 |
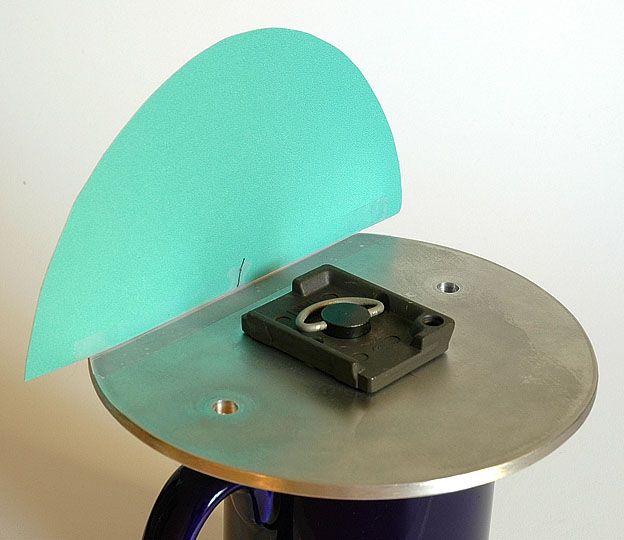
The picture to the left is my homemade base plate. The plate makes it easy to connect the telescope to my normal camera tripod.
In this picture the base is sitting on top of a tall coffee mug. The base plate is made so that it can be used with a Bogen tripod head or (by changing the quick release plate) it can be used with an Arca-Swiss quick release tripod head. It can even be used without a quick release
plate and connected to any tripod. The four counter sunk holes in the center of the plate are for use with my homemade Arca-Swiss quick mount plate which is not used in this setup.
The protractor is also homemade. I created it using AutoCAD. After creating the protractor, I printed it out, glued it to a thin piece of cardboard and then taped to the bottom of the base plate. The protractor is there to allow easy set up for auto-tracking. It allows the telescope to be tilted to the correct angle. I just use a thread with a small weight attached to it as a vertical reference line. As you can see the small weight is nothing more than a brass nut. |
 |
The picture to the left shows the bottom side of the base plate. As you can see I have attached the Bogen quick release plate for use with the Bogen 3030 tripod head. The two holes in the base plate are for small bolts that mount the base to the telescope. |
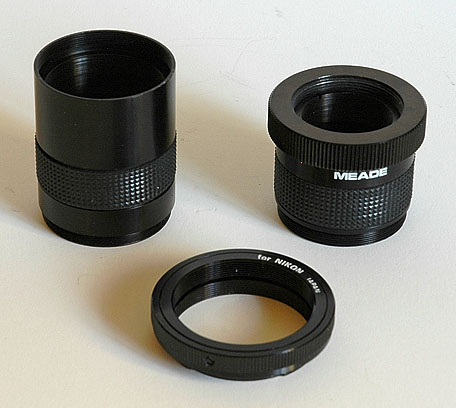 |
This picture shows the Meade T-mount adapter tubes as well as the Nikon T-mount adapter ring. The T-mount adapter tube has two separate sections with allow two different magnification levels. If you want a slightly higher magnification level the two tube screw together. For the moon shot I used only the shorter tube. The T-mount ring screws on to the T-mount adapter tube and then the whole thing screws on to the back of the telescope. |
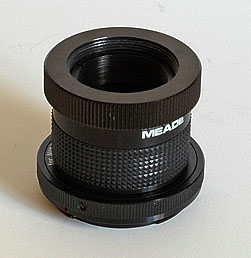 |
This picture shows the Meade T-mount adapter tubes with the Nikon T-mount ring now attached. This whole setup can now be attached to the backend of the telescope. |
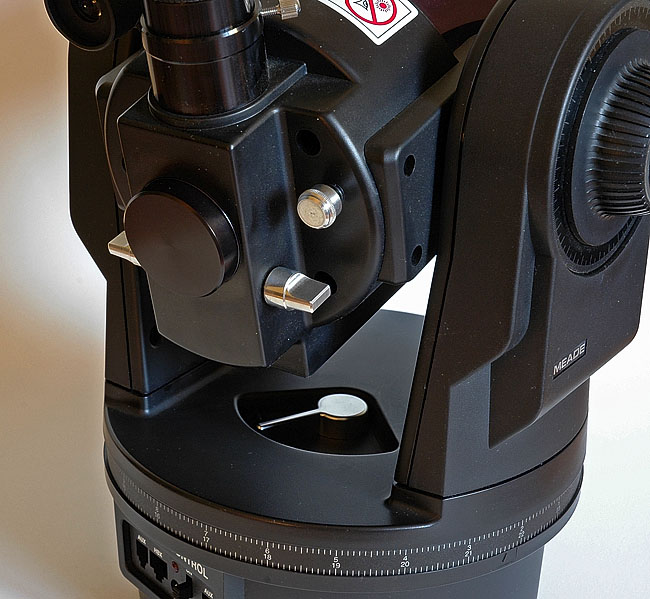 |
This picture shows the back of the telescope before the T-mount adapter tubes has been attached. In this picture there is a cap on the telescope where the T-mount tube attaches. Also notice the silver knobs. The round knob is the focus knob and the flat one controls the mirror inside the telescope that directs the image to the eyepiece. As it is show now the image would be viewable through the eyepiece. When the knob is turned the internal mirror flips out of the way allowing the image to be directed through the hole in the back of the telescope to the camera. |
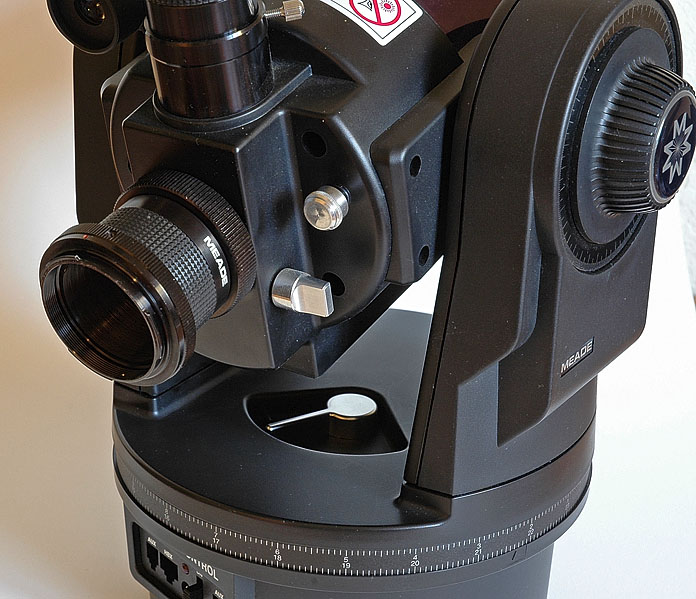 |
This next picture shows the back of the telescope again but this time the T-mount adapter tube has been attached. The back cap was removed and the T-mount tube was screwed on. Notice in this picture that the flat silver knob has been turned 90 degrees so that the image from the telescope can now be directed at the camera rather than the eyepiece. |
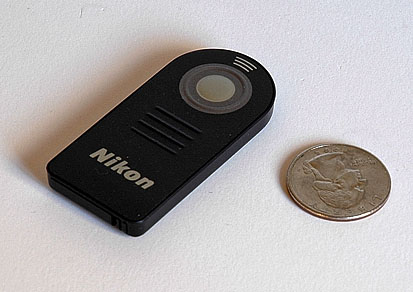 |
One other item that helped in taking the moon shot was a Nikon remote control (ML-L3). This allows the camera to fire when the remote control button is pressed. This keeps the telescope from moving by eliminating the need to press the shutter release button by hand. This whole setup is pretty prone to movement from the slightest touch even though a sturdy tripod is used. The remote control is very small as you can see. I placed a quarter next to it to show you the relative size. Another method to minimize shake would be to use the camera's self timer. |
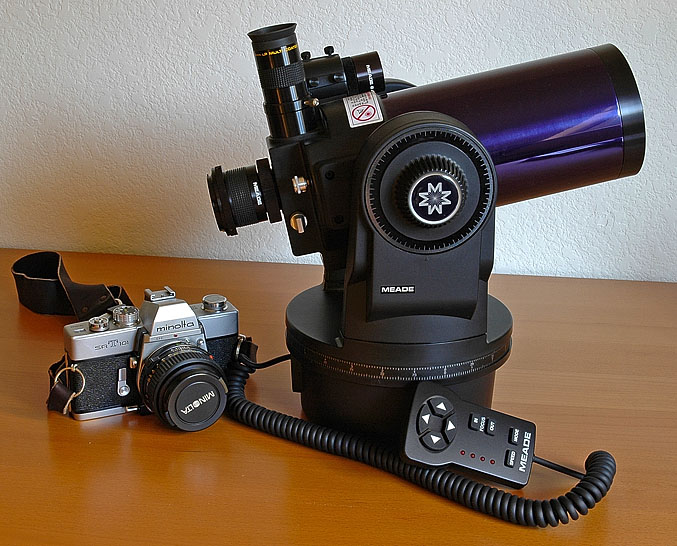 |
This picture shows the telescope set up and ready for the tripod base plate to be attached. I have also placed a camera next to the telescope so that you can see the relative size of the different components. In this picture you can also see the telescope motion control. This hand held unit allows the user to position the telescope without actually touching the telescope. |
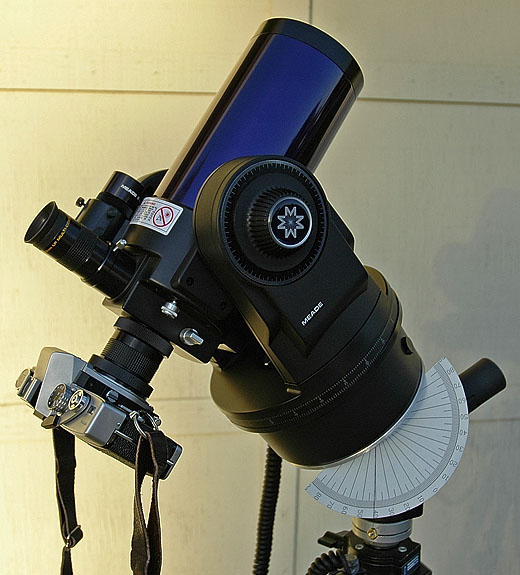 |
Here is a close-up view of the setup. All individual components can be seen in this view except for the tripod. |
 |
This is a picture of the actual digital camera that was used to take the picture of the moon. Of course the lens shown in this picture was removed to allow the camera body to be attached to the telescope. |
 |
The only reason I am showing this view is so that you can see the front of the telescope. |
|
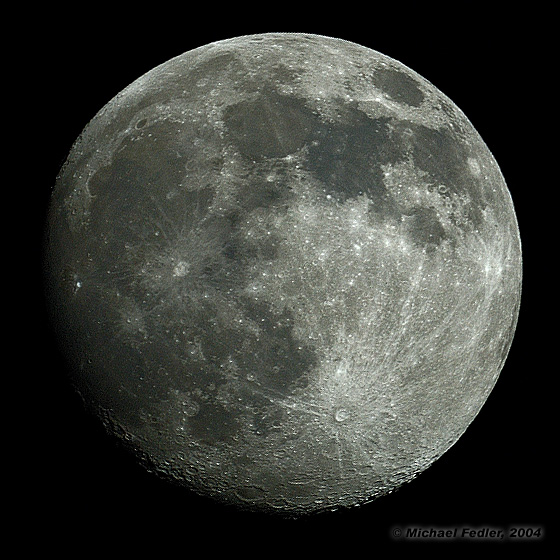
To take the moon picture I set up the telescope as shown above in my front yard. I set the telescope up in the automated tracking
mode but was unable to line it up accurately. I didn't really need the automated tracking anyway. I aimed the telescope at the
moon and first looked at it through the eye piece. I then flipped internal mirror control knob so that the image would be
displayed to the camera. I then refocused using the camera's eye piece. I also set the camera to manual mode and set the
shutter speed to 1/250th of a second just as a guess as a starting point. Originally I had the ISO setting of 200 but found ISO
400 to be more appropriate. I positioned the moon in the center of the viewing field and took several pictures. I did this several
times, each time repositioning the image and reshooting the picture. The reason I did this was to ensure that the entire moon
would be captured since it filled almost the entire camera's viewing field. I also wanted to take several pictures to have a
better change of obtaining one picture that did not have blurring caused by camera shake. I used the Nikon ML-L3 remote control
to fire the camera so that I did not need to touch the camera. This was to keep the telescope from shaking from me touching it.
After taking multiple pictures, I loaded the files into my computer and selected one of the ones I liked. I then adjusted the brightness and contrast to my liking. I then applied some unsharp mask to bring out the detail. I resized the image down to 30% of the original size so that it would be easy to display on the web. I also did one more unsharp mask after the image was resized to bring back the detail that was lost during the resize process. |
© Michael Fedler 1997 - 2024