|
|
|
||||||||||||||||||
|
|
|
|
|
||||||||||||||||
|
|
|
|
|
||||||||||||||||
|
|
|
|
|
||||||||||||||||
|
|
|
||||||||||||||||||
|
|
|
|
|
|
|||||||||||||||
|
|
|
|
|||||||||||||||||
|
|
|
||||||||||||||||||
|
|
|
||||||||||||||||||
|
|
|
|
|
|
|
||||||||||||||
|
|
|
||||||||||||||||||
|
|
|
||||||||||||||||||
|
|
|
|
|
 |
|
||||||||||||||
|
|
|
|
|||||||||||||||||
|
|
|
|
|||||||||||||||||
|
|
|
 |
|
||||||||||||||||
|
|
|
|
|||||||||||||||||
|
|
|
|
|
|
|
|
|
|
|
|
|
|
|
|
|
|
|
|
|
|
|
|
||||||||||||||||||
|
|
|
|
|
||||||||||||||||
|
|
|
|
|
||||||||||||||||
|
|
|
|
|
||||||||||||||||
|
|
|
||||||||||||||||||
|
|
|
|
|
|
|||||||||||||||
|
|
|
|
|||||||||||||||||
|
|
|
||||||||||||||||||
|
|
|
||||||||||||||||||
|
|
|
|
|
|
|
||||||||||||||
|
|
|
||||||||||||||||||
|
|
|
||||||||||||||||||
|
|
|
|
|
|
|
||||||||||||||
|
|
|
|
|||||||||||||||||
|
|
|
|
|||||||||||||||||
|
|
|
|
|
||||||||||||||||
|
|
|
|
|||||||||||||||||
|
|
|
|
|
|
|
|
|
|
|
|
|
|
|
|
|
|
|
|
|
| HOW TO CREATE A COPYRIGHT BORDER |
| USING "MICROSOFT IMAGE COMPOSER" |
|
This page has been set up to show you how I create the border on my
pictures. I use the border to enhance the appearance of the image as well as
using it to display my copyright information. Hopefully this information well
be of some help to others in recreating the same result. I use "Microsoft Image
Composer" to create the border but I'm sure other programs can be used to obtain
similar results.
Since this page includes quite a few rather large images for illustrations purposes, I have saved the images at a higher compression rate than I normally use. This was done in order to allow the page to load quicker than would otherwise be possible. So if the images don't look up to the quality standards of other images on my web site, that's the reason. |
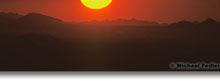
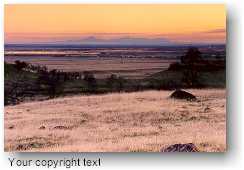
ORIGINAL IMAGE
| Below is the original image used in this example prior to adding the border. |
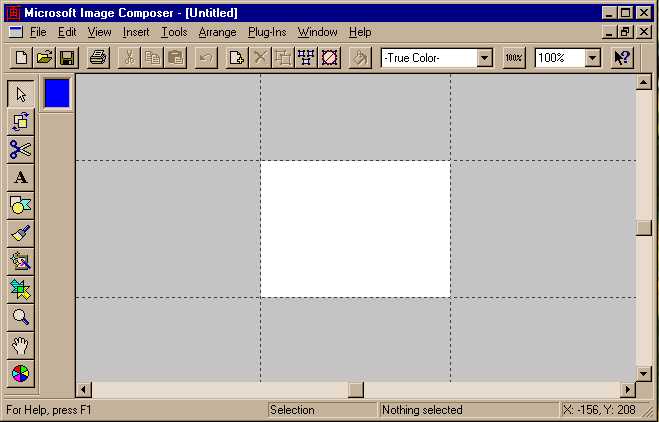
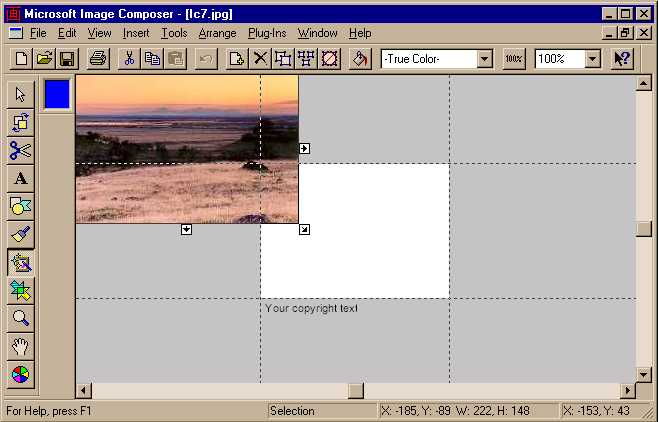
DEFAULT "IMAGE COMPOSER" LAYOUT
| To start, it is a good idea to understand the work area in "Image Composer". This will help in understanding later steps. The image in this example is what "Image Composer" looks like when the program is started. I have purposely used a smaller window for the application than I normally would to allow for easier display on the web. Under normal working conditions I would open the application so that it uses the entire working area of my monitor. Note the two different colored areas in the work area of the application, the inner white area and the area around it which is gray. The white area represents the area that will be retained when an image file is saved. Any portion of the image that extends into the gray area will be eliminated from the final saved image file. The white working area can be enlarged or reduced in size by dragging the dashed lines that define it's perimeter. |
CREATE A TEMPLATE FILE
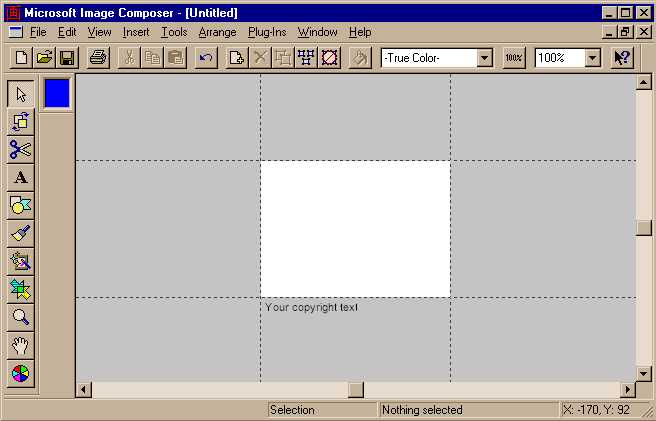
| The first step is to create a border template file. This template can be saved to allow you to use it over and over. This will enable you to obtain consistent results for multiple pictures. The first step is to insert the text, such as your copyright information. Use the text tool which is represented by the large letter "A" icon on the left edge of the "Image Composer" application. You can select whatever font you like as well as the size and color of your choice. Keep in mind that the shadow effect to be applied later will need to extend over the text you insert, so don't use a font size that is too large. The text you install should be located in the gray area of the application close to the bottom edge of the white area and slightly to the right of the left edge. (See the example below) If you plan on using this border on multiple images, now is the time to save this layout. You should save the file at this point in the "Microsoft Image Composer" format. The resulting file will have a ".mic" file extension. Once it is saved you can use this new file as your starting point for every picture that you will be adding the border to. Saving the image in the "Microsoft Image Composer" format will allow you to retain all the information including the information in the gray area which would be discarded if you saved it in any other image format. Saving the image in the "Microsoft Image Composer" format will also allow you to modify the text at a later date. This can come in handy when you want to modify the date or name on the copyright. Save the file using a name that will make sense to you later. In this example I will use the file name "frame.mic". |
INSERTING YOUR RAW IMAGE
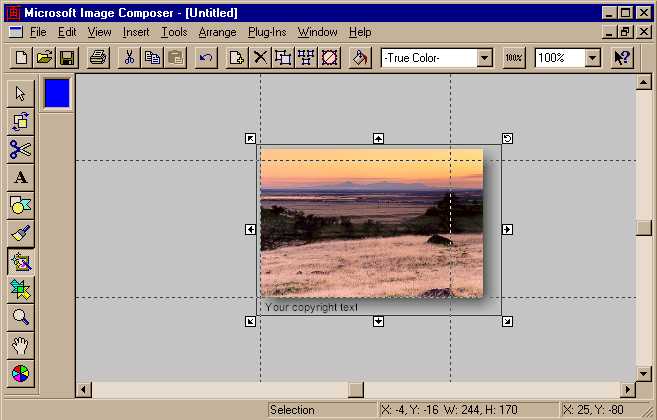
| The next step is to open your border template file and insert your picture. Open your template file "frame.mic" which was created in the previous step. After opening your template file you are ready to insert your picture into the work area. To insert your picture, select the "Insert" option from the menu at the top of the application. Select the picture you wish to insert from the directory where you have it saved on your computer and click "OK". Note at this point that the picture is located in the upper left side of the "Image Composer" application. Also note that the picture has arrows at several locations around the edges of the picture. This indicates that the picture is the active portion of the work area and that it can be moved or resized. Go to the next step to find out how to reposition your picture into the correct location. |
ALIGNING YOUR RAW IMAGE
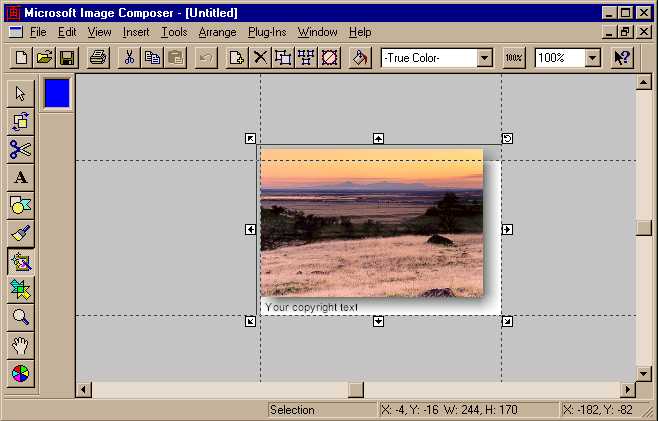
| To reposition your picture to the correct location move your cursor to the center of the picture. When you do this your cursor will change to an arrow the points in four different directions. Once this happens, hold down your mouse button and drag the picture so that the bottom and left edge of the picture line up exactly with the border lines of the white work area. (See the example below) Make sure that when you move the picture that your cursor is in the center of the picture and not on one of the edges. If you try to move the picture using one of the edges; you will resize the picture which will result in a loss of proper aspect ratio. If that happens, start over by deleting the picture. To do this press the delete button on your keyboard while the picture is the active portion of your work area. Then insert the original picture again as described in the previous step. |

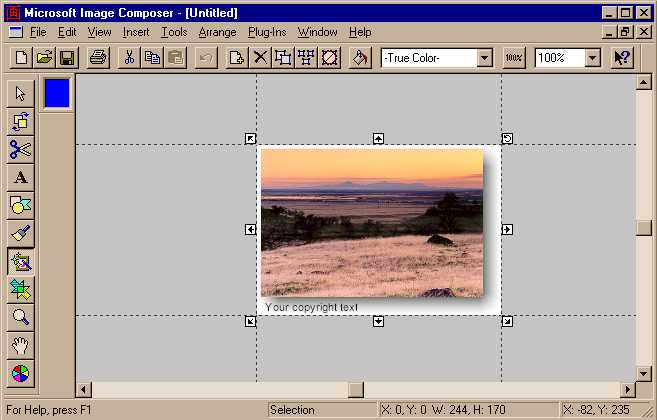
ADDING THE SHADOW EFFECT TO YOUR RAW IMAGE
| Once you have the picture positioned correctly it is time to add the shadow effect which will become your picture border. Make sure that the picture still has arrows on the edges and corners. This is to make sure that the picture is still selected as the active portion of the work area. If it does not have the arrows, just click on the picture again to select it. To add the shadow, select the "Tools" menu located at the top of the "Image Composer" application. Once the "Tools" menu appears select "Effects" from the list of options. This will open a window which allows you to select from a number of special effects. Scroll to the "Drop Shadow" effect and click on it. Click on the "Apply" button to install the shadow. Note that there are shadow controls that can change the size, position, and darkness of the shadow. These controls can be adjusted prior to applying the shadow by clicking on the "Details" button after selecting the shadow effect. If the shadow is not to your liking once it has been applied and you want to change one of the "Drop Shadow" controls. You can undo the shadow effect by selecting the "Edit" menu at the top of the "Image Composer" application. Click "Undo Drop Shadow". Note that this must be done before you do anything else or the shadow will become permanent and the only way to change it at that point is to start over. |
REALIGNING THE BORDERS ON YOUR IMAGE
| Once the shadow has been installed, your next step is to realign the active work space window borders. Notice that when the shadow effect was applied that the border lines around your picture moved outward in all directions. This new border is where the active work area borders should be moved. Your text information should now be located within the new border lines. Click and drag each one of the dashed lines so that they fall exactly on top of the new border lines. In the example below two of the active borders have been moved to the correct final position. |
FINAL ALIGNMENT OF THE IMAGE BORDERS AND SAVING THE FINAL OUTPUT
| Once all of the active borders have been moved to their final locations it is time to save your new picture. This time when you save the picture, rename it so that it does not overwrite your template file. Also save it in the format of your choice for it's intended use. For display on the Internet I recommend saving your picture in JPEG format. JPEG format compresses your file size yet retains most of the color pallet information. In JPEG format you have the ability to specify how much compression you want applied. The more compression that is applied the smaller the resulting file size. Also the more the compression that is applied the less the image quality. |
THE FINAL RESULT
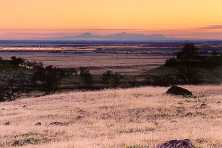
| The final result should look something like this. The picture now includes the copyright text as well as the shadow effect. Good luck with your pictures! |
© Michael Fedler 1997 - 2024